How to save MQTT messages to MySQL database
Most of the services we enjoy on the Web are provided by web database applications. Web-based email, online shopping, forums and bulletin boards, corporate websites, and sports and news portals are all database-driven.
To build a modern web site, you need to develop a database application. The MySQL database is suitable for a wide variety of use cases, including mission critical apps, dynamic websites, and as an embedded database for software, hardware, and appliances.
Many IOT platforms, including AWS, Google, and IBM, support MQTT, but most online broker, such as Mosquitto, cannot store incoming messages in databases. Most solutions are that we subscribe to the topic and receive all incoming messages that are coming to the topic and then store the incoming messages in the database.

Figure: MQTT with MySQL database
In this blog, you will learn how to use the EMQ broker to store MQTT messages in the database. With EMQ Broker you can write plugins. These plugins can be used to tap the incoming and outgoing messages with ‘hooks’. Hooks are the functions that are called when a certain event occurs.
Let’s get started by creating a new Ubuntu Instance with the name EMQ instance on Amazon AWS console. Once the instance is created, assign IP address to that instance.

Update security groups in the AWS. Add the inbound rule to give access to port on which the MQTT broker will run.

Now open putty and access Ubuntu on the AWS server via SSH by giving the IP address assigned to the instance. The username by default is Ubuntu.

After login we will install EMQ broker. Type the following commands to install dependency and broker
$ sudo apt-get update
$ sudo apt-get install build-essential
$ Sudo apt-get install erlang
$ git clone https://github.com/emqtt/emq-relx.git
$ cd emq-relx && make
$ cd _rel/emqttd && ./bin/emqttd console
Once the EMQ broker is installed we can install MySQL by following the steps below
$ sudo apt-get update
$ sudo apt-get install mysql-server
$ mysql_secure_installation
$ sudo apt-get install git curl zip unzip
$ sudo add-apt-repository ppa:ondrej/php
$ sudo apt-get install php7.4-fpm php7.4-common php7.4-xml php7.4-cli php7.4-curl php7.4-json php7.4-mcrypt php7.4-mysqlnd php7.4-sqlite php7.4-soap php7.4-mbstring php7.4-zip php7.4-bcmath
$ sudo nano /etc/php/7.4/fpm/php.ini
Find the line that reads cgi.fix_pathinfo=1 and Change it to read cgi.fix_pathinfo=0
$ cd ~
$ mkdir bin
$ php -r "copy('https://getcomposer.org/installer', 'composer-setup.php');"
$ php composer-setup.php --install-dir=/home/ubuntu/bin --filename=composer
$ mysql –u root –p
Mysql>CREATE DATABASE dreamfactory;
Mysql>GRANT ALL PRIVILEGES ON dreamfactory.* to 'dfadmin'@'localhost' IDENTIFIED BY 'YOUR_PASSWORD_HERE';
Mysql>FLUSH PRIVILEGES;
Mysql> quit

$ sudo mkdir /opt/dreamfactory
$ sudo chown -R ubuntu /opt/dreamfactory
$ cd /opt/dreamfactory
$ git clone https://github.com/dreamfactorysoftware/dreamfactory.git
$ composer install --no-dev --ignore-platform-reqs
$ php artisan df:env
Configure the dreamfactory as shown in below figure. The username and password is dfadmin.

$ nano .env
Uncomment (remove the ##) the two lines that read ##DB_CHARSET=utf8 and ##DB_COLLATION=utf8_unicode_ci
$ php artisan df:setup
Answer the onscreen prompts to create your first admin user for the system
$ sudo chown -R www-data:ubuntu storage/ bootstrap/cache/
$ sudo chmod -R 2775 storage/ bootstrap/cache/
$ php artisan cache:clear
$ sudo apt-get install nginx
$ cd /etc/nginx/sites-available
$ sudo cp default default.bak
$ sudo nano default
Copy and paste from the file attached and exit editor
$ sudo service php7.4-fpm restart && sudo service nginx restart
At this point, the dreamfactory application is installed. DreamFactory is an open source REST API middleware platform that provides RESTful services for building mobile, web, and IoT applications. We will go to the installation of mySql database and create users so that the dreamfactory can access it. Login to dreamfactory by using default username and password which is entered during the setup process. We have to create roles which are permissions for devices. Enter the ip address which is generated at the time of EMQ INSTANCE creation for example 35.172.132.132/dreamfacrory/dist/index.html

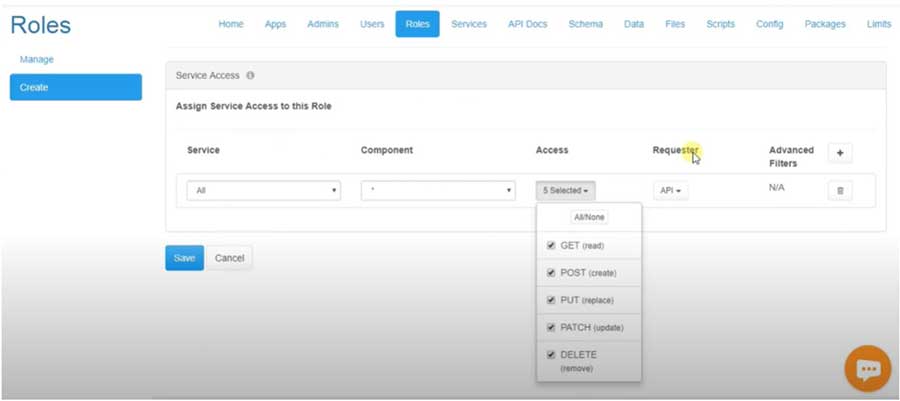
Go to the apps and generate the API key for the device which is the remote access key. Enter details as shown in the below figure


After the API key has been generated we will create a connection to the MySQL database click on the services and create then select MySQL database. Fill username, port number Database, username and Password.


The API key needs to be updated in the emq_plugin_template in order to send data to the MySQL database update the api key as shown below.

We can now send data from any client and save it in the database. Let us take Raspberry pi with sensors such as temperature, pressure and humidity connected. The paho-mqtt client running on the Raspberry pi sends the data to the MySQL database. To install paho mqtt in the Raspberry pi type in terminal.
$ pip3 install paho-mqtt
To connect to the server we can type
client = mqtt.Client()
client.on_connect = on_connect
client.connect("35.172.132.132", 1883, 60)
The below command will send topic to the broker and it gets saved in the MySQL database.
client.publish('raspberry/topic', payload=i, qos=0, retain=False)


